Automation Setup
Java Install and configuration
(Install by following this video: https://www.youtube.com/watch?v=y6szNJ4rMZ0 ) OR
-
Check if Java JDK already installed by using command " java -version" in the terminal. If it returns with a version number that means java is already installed.
-
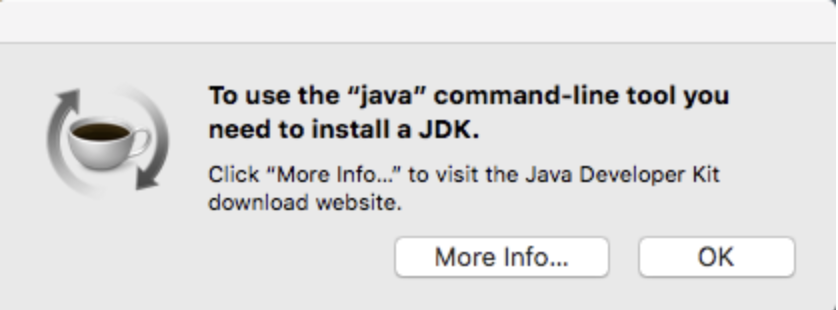
If not installed it will show a window asking if you want to install java. On that window click More info.
-
Once https://www.oracle.com/technetwork/java/javase/downloads/index.html opens in a browser select the latest Java JDK.
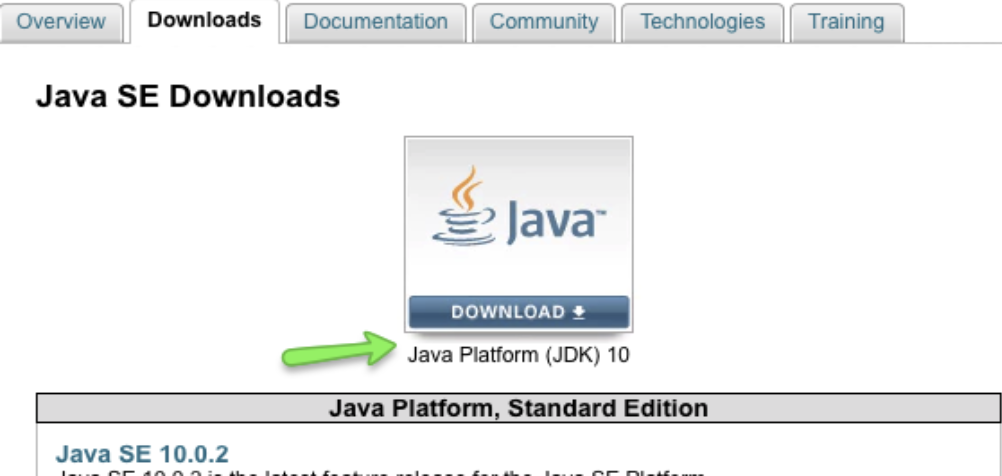
-
Accept license agreement and click on download for MacOS (this should trigger the download of a .dmg file).
-
Once downloaded double click on the file and follow the instruction on the installation screen.
-
After you get "Install Succeeded" close the window.
-
To check it was installed successfully, open terminal and enter command " java -version". You will now see it return installed Java version.
Next JAVA HOME needs to be setup. JAVA HOME is the environment for JAVA. It means that you are providing a path for compiling a JAVA program and also running the same. So, if you do not set the JAVA HOME( PATH ) and try to run the program in the command prompt. You will deal with an error as javac : not recognized as internal or external command.
- First, check if JAVA_HOME is already setup:
- In the terminal enter command " echo $JAVA_HOME" , if this doesn't return anything that means it is not configured.
- To configure, open .bash_profile by entering " open ~/.bash_profile" (Note: If .bash_profile doesn't exist follow the instruction below on how to create one)
- Enter " export JAVA_HOME=$(/usr/libexec/java_home)" and save the file.
- Quit terminal and open it again.
- Enter command " echo $JAVA_HOME" and if it returns a path then you have installed and configured Java JDK.
Creating .bash_profile
bash_profile is a configuration file for bash shell. When bash is invoked as an interactive login shell it first reads and executes commands from ~/. bash_profile. ... This file can be used to export variables in shell. You can put your variables in ~/.bashrc also apart from bash profile.
- Open terminal to check if .bash_profile exists. Use command " ls -al" on your home directory. (Command to go to your home directory. " cd ~/" )
- The above command will populate a list of all the files under that directory. Check if a file with name ".bash_profile" exists here.
- If not, then enter command " touch .bash_profile" to create your new file.
- To check if it got created. Enter command " ls -al" and check the list to see .bash_profile created.
Downloading Eclipse
Eclipse is an integrated development environment (IDE) used in computer programming, and is the most widely used Java IDE. It contains a base workspace and an extensible plug-in system for customizing the environment.
-
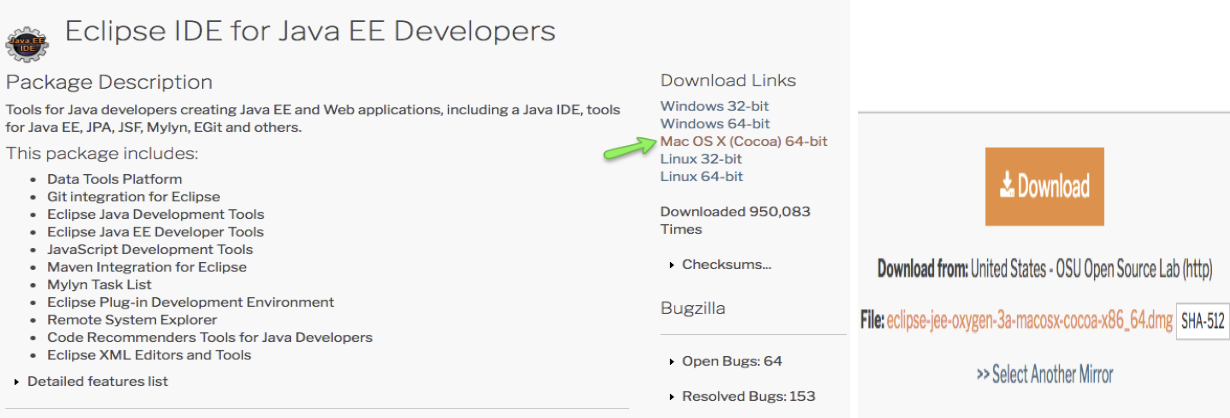
Open https://www.eclipse.org/downloads/packages/ in a browser.
-
Once the download completes, click on it to open installation.
-
Drag and drop Eclipse in the Applications folder.
-
To check, go to finder and click on Applications.
-
Double click on Eclipse icon and click on open when security popup displays.
-
Follow the instructions to set the workspace path and click next.
-
Verify eclipse is launched.
Appium installation
Appium is an open-source tool for automating native, mobile web, and hybrid applications on iOS mobile, Android mobile, and Windows desktop platforms.
-
Open http://appium.io/ in a browser.
-
Click on Download Appium.
-
Click on .dmg link to start the download. (Note the version might be different from screenshot)
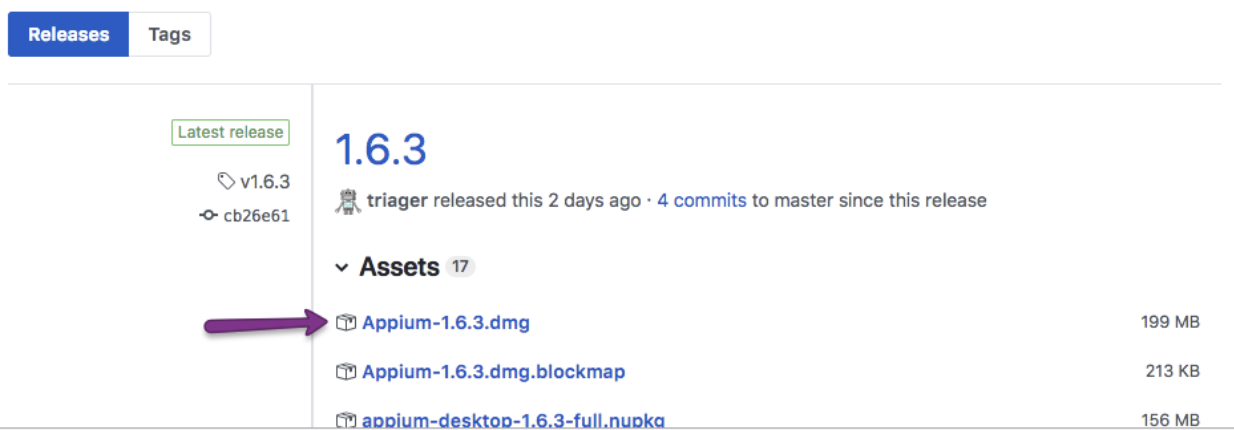
-
Once download is complete click on it to open the installation window.
-
Drag and drop Appium into the Applications folder.
-
To check, go to Applications folder.
-
Double click on Appium. (Verify you can see following screen)
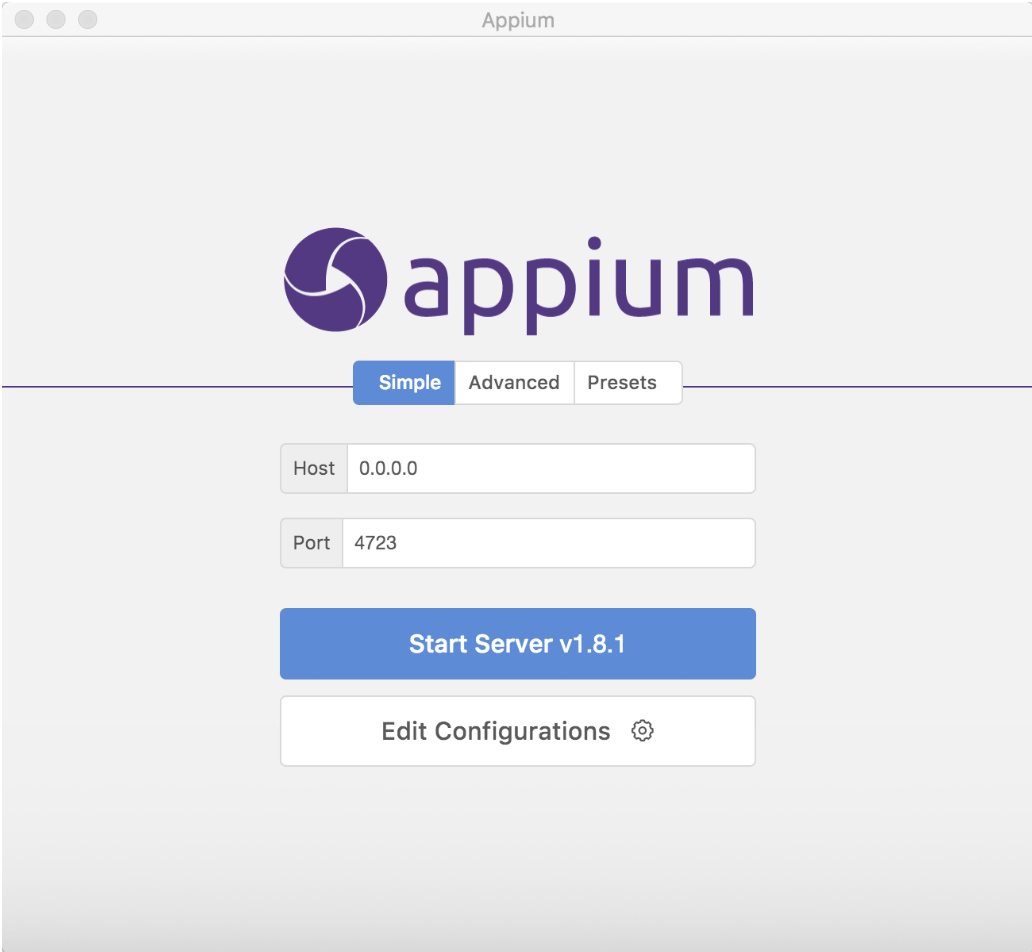
Install Node
Node.js is a JavaScript runtime built on Chrome's V8 JavaScript engine. Node.js uses an event-driven, non-blocking I/O model that makes it lightweight and efficient. Node.js' package ecosystem, npm, is the largest ecosystem of open source libraries in the world.
- Open Terminal and run command “node -v” to check if node is already installed. If installed it will return version number.
- If node is not installed then run command “brew install node”
- If brew is installed and needs update, run command “brew upgrade node”
Configuring WebDriver User Agent Project
Useful link: https://github.com/appium/appium-xcuitest-driver/blob/master/docs/real-device-config.md#basic-automatic-configuration
-
In the terminal run command “brew install libimobiledevice --HEAD” to install libimobiledevice
-
In the terminal run command “npm install -g ios-deploy”
-
Open WebDriverAgent project in xcode. (This xcode project file is installed with Appium installation. You can locate this project file: /Applications/Appium.app/Contents/Resources/app/node_modules/appium/node_modules/appium-xcuitest-driver/WebDriverAgent/WebDriverAgent.xcodeproj )
-
Change the Bundle identifier to a unique identifier and correct code signing.
-
Change the Bundle identifier to a unique identifier and correct code signing.
-
To add a unique bundle identifier, change the Bundle identifier from “com.facebook.wda.lib” to a unique one such as “com.vokal.qa.wda.lib” in the identity block.

-
For correct code signing, under signing block make sure "Automatically manage signing" is checked.
-
Click on team dropdown and select option Add team. Follow the instructions to sign in with your Apple ID and once done exit out of that window.
-
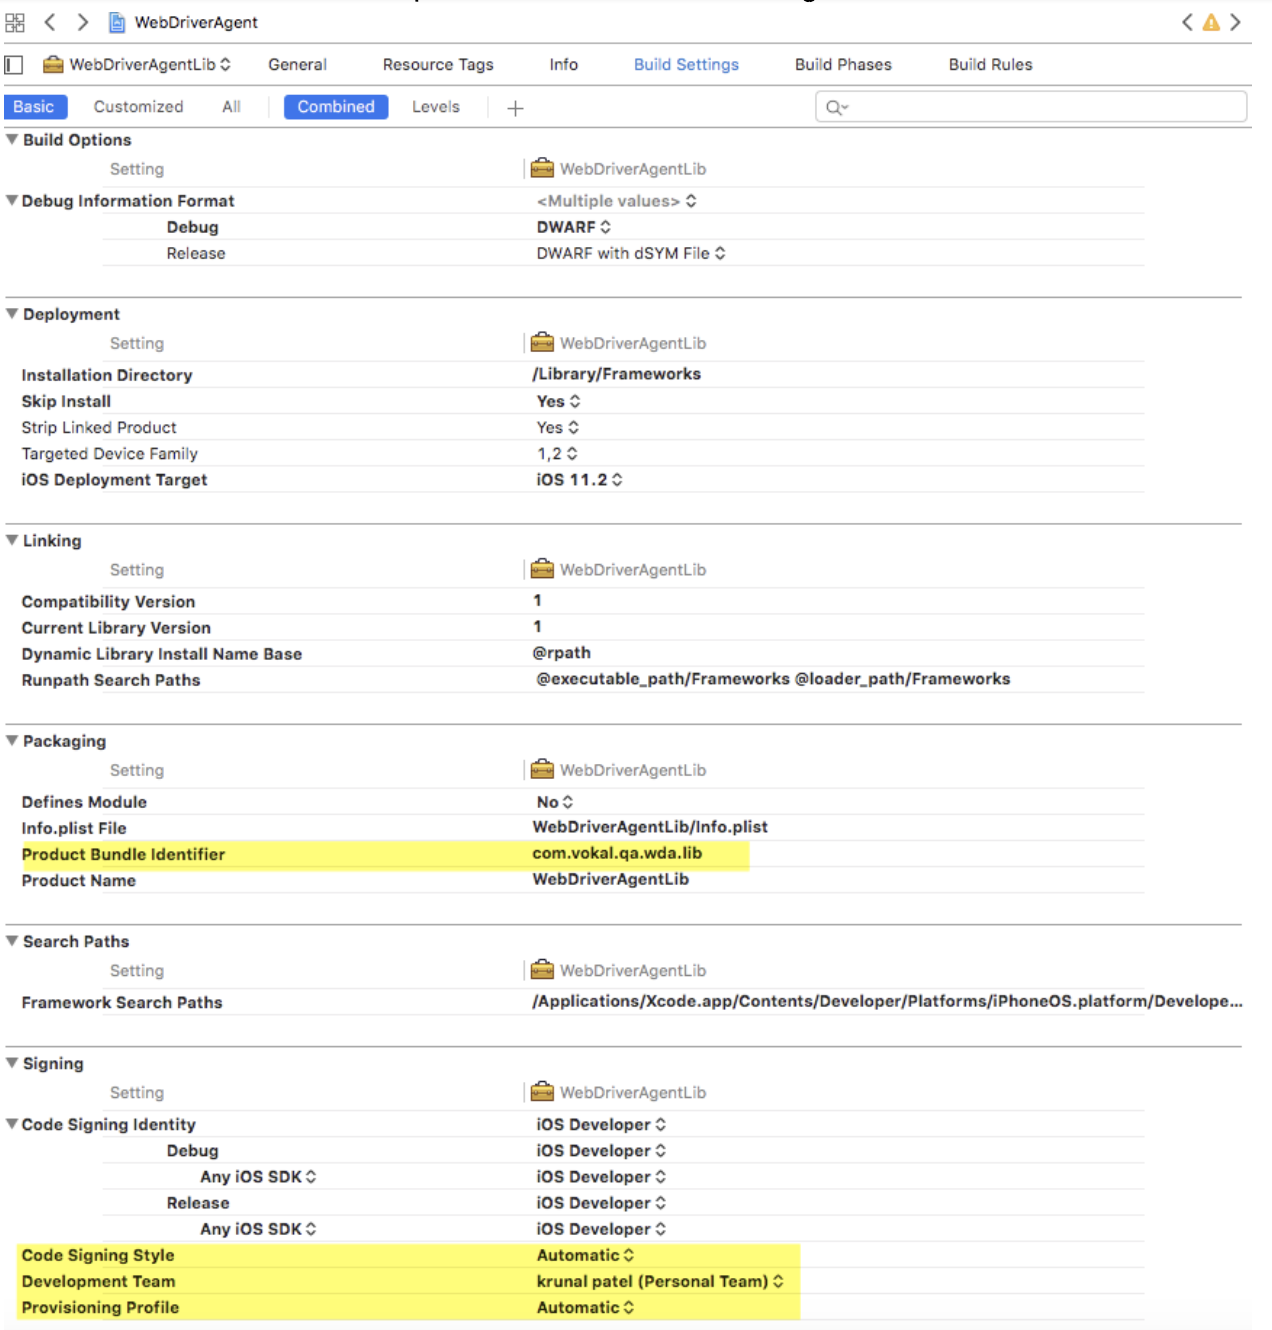
Now on clicking of "Build Settings" tab you should be able to see following screenshot. Compare and make sure the settings match with this screenshot.
-
-
Build the project on an actual device by selecting your device as shown in screenshot below and hitting play button.
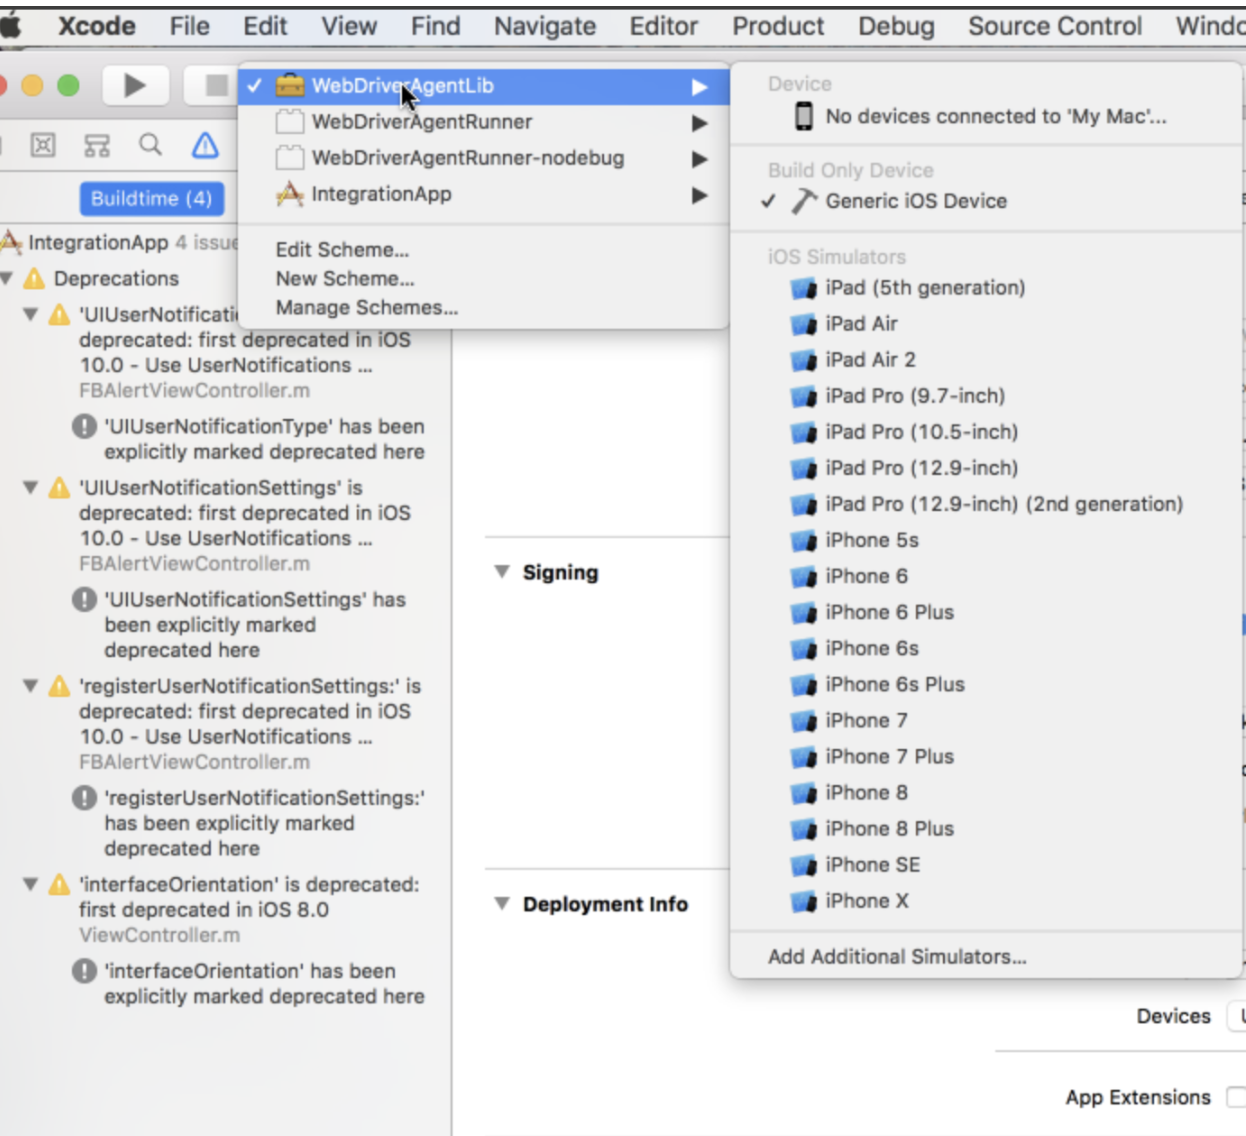
-
Once the project builds successfully, run following command in the terminal and check if WDA got installed on the phone.
“xcodebuild -project WebDriverAgent.xcodeproj -scheme WebDriverAgentRunner -destination 'id=' test”
Project with Maven
Apache Maven is a software project management and comprehension tool. Based on the concept of a project object model (POM), Maven can manage a project's build, reporting and documentation from a central piece of information.
- Install Maven.
-
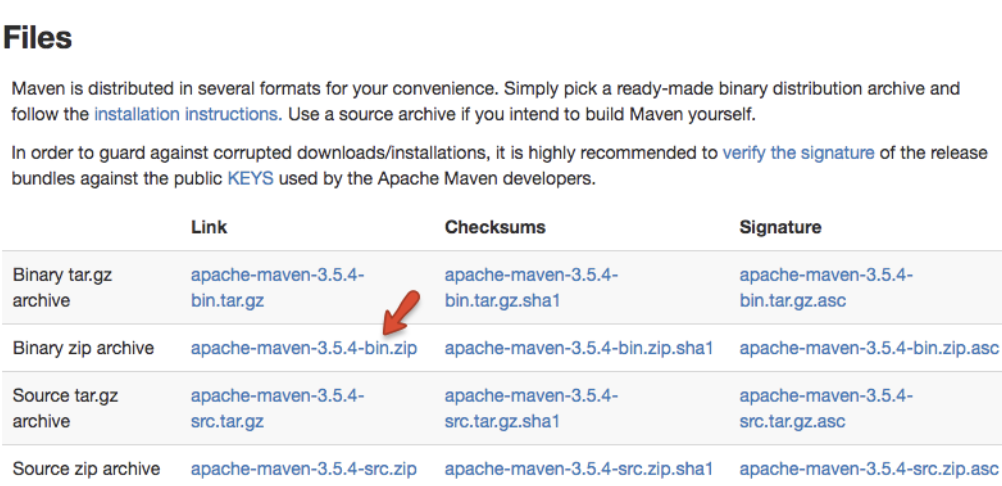
Download the latest Maven zip folder from: https://maven.apache.org/download.cgi
-
Create folder with name “apache-maven” at /usr/local/ (Terminal command sudo mkdir apache-maven)
-
Copy the downloaded folder from Downloads into the folder created in above step.
-
Open terminal and type in command “open ~/.bash_profile”
-
Add M2_HOME and PATH as shown in the screenshot below. (Note that maven version you downloaded may defer and need to enter correct version number)
- export M2_HOME=/usr/local/apache-maven/apache-maven-3.6.0
- export PATH=$PATH:/usr/local/apache-maven/apache-maven-3.6.0/bin

-
Quit terminal and restart.
-
Enter command "mvn -v" . Verify the version number that was downloaded is displayed.
- Install Maven m2e plugin for eclipse
-
Open Eclipse.
-
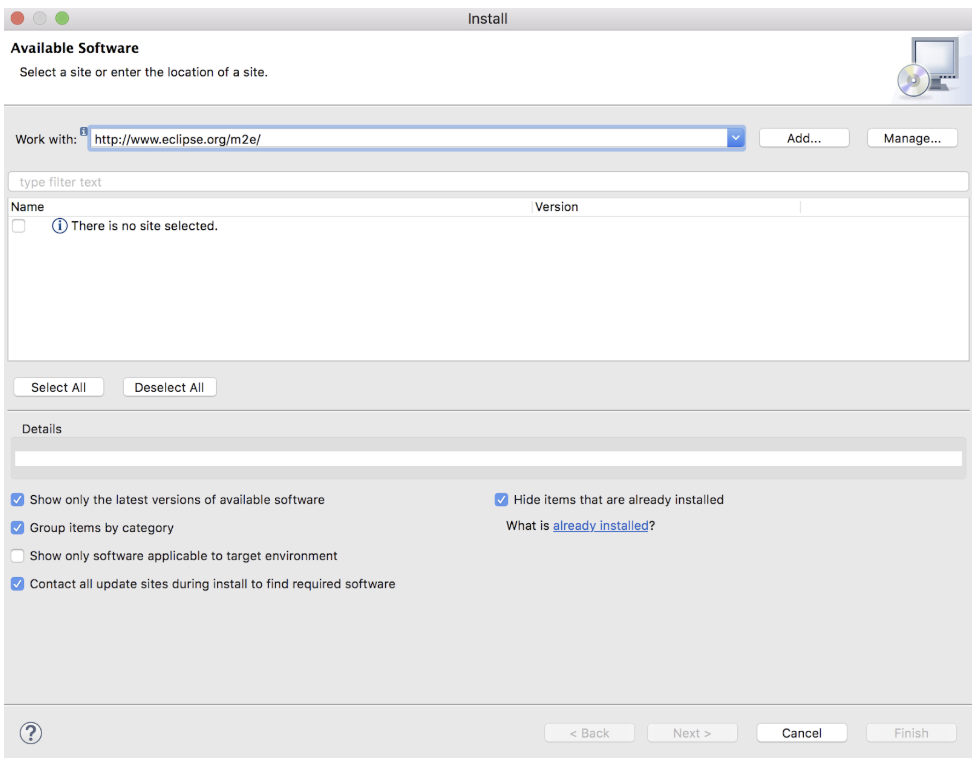
Click Help --> Install New Software.
-
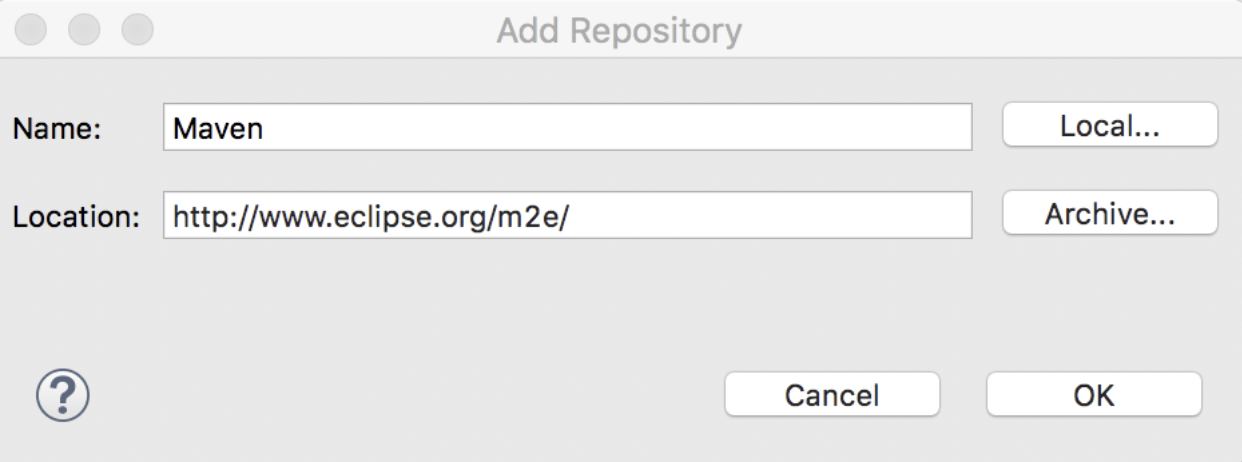
In work with text box, enter http://www.eclipse.org/m2e/ , if this URL doesn’t work try http://download.eclipse.org/technology/m2e/releases
-
Select maven plugin installer and follow instructions to finish.
-
Check by opening File > Import > Maven > Existing Maven Project. (If you can see this, the plugin was installed correctly.)

